1 — Pressing Before You Sew
Sewing up your own Make by TFS Lucie Robe? Start our Sew-Along with the Pressing Before You Sew steps here!We strongly recommend using an iron to press your pieces where required, before you begin sewing. This helps to ensure accuracy when sewing and to give a clean and tidy finish.

Take the two front pieces and, as indicated by the notch at the hem edge, press the centre front edge under twice at 1cm, towards the wrong side. The total amount folded is 2cm, with a 1cm finished fold. You will have a triangular piece of fabric protruding at the neck edge, we will come back to sort that later!


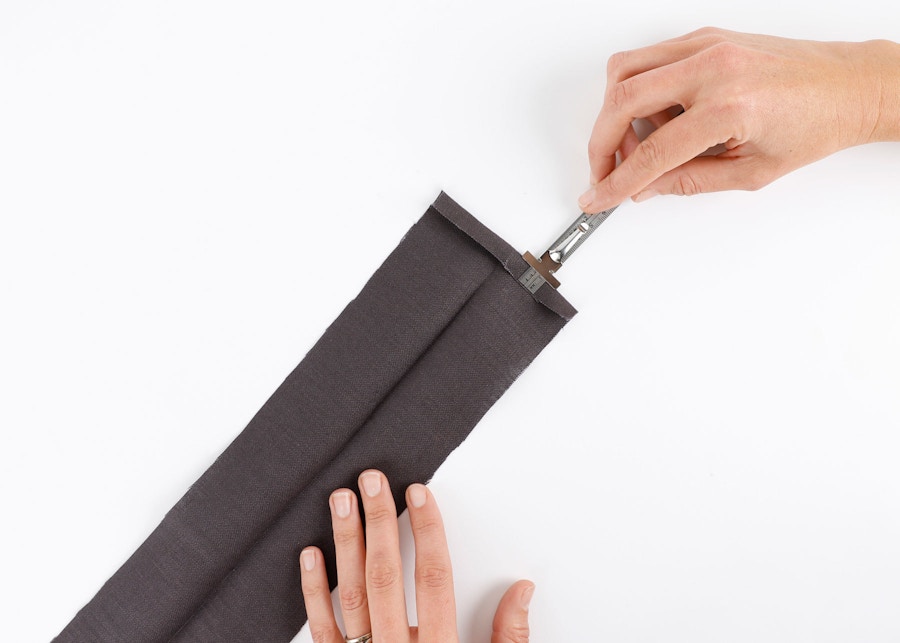
Next we will fold up all the hems. On the fronts, press up the seam allowance 1cm towards the wrong side, then back again a further 4cm in line with the notches.


Repeat for the back pieces and both sleeves. You may find it helpful to cut a 4cm wide strip of heavy card to help guide your pressing!

Take your collar pieces and press them in half lengthways with the wrong sides together. Next, fold back the 1cm seam allowance along one long edge on each collar piece. Make sure to fold back the opposite edge on each piece so you have a pair (i.e. the pieces are mirrored).

Press your waist tie pieces in half lengthways at the notches indicated, with the wrong sides together. Then press the outer short sides of the waist tie under 1cm (not the centre edges the that have two notches).

Fold your pocket pieces in half at the centre notches with the right sides together and press.

Lastly for the pressing, take the back neck and waist tie loop pieces and press them in half. Unfold and press 1cm on each side to the centre crease line and fold in half lengthways and press again. The pressed pieces will measure 1cm in width.
Once you have done your pressing, move on to sewing your front panels!
2 — Front Panels

Using your pattern as a guide, mark the dart point and darts legs onto the wrong side of your fabric using a fabric marker or tailors chalk. Next, fold your front piece in half down the centre of your dart and pin in place. Make sure you match the dart legs on each side.

At your machine, sew the dart following the line you have drawn and removing the pins as you come to them. Back tack at the beginning of this seam but when you get to the dart point, do not back tack. Back tacking here can cause the dart point to pucker.

Instead, leave a tail of thread a couple of centimetres long and secure with a knot. Be careful not to pull too tightly when tying your knot. Press this seam towards the centre front.

To prevent the front neckline edge from stretching out while sewing your robe, stay stitch along this edge just inside the 1cm seam allowance. Sew over the beginning of your dart, ensuring it is still pressed towards the centre front. Try to keep your fabric as flat as possible during this step so it doesn’t pull and warp the edge as you sew. Repeat for both your fronts.
After sewing your front panels, move on to sewing your pockets!
3 — Pockets
After sewing your front panels, continue on to sew the pockets!

Using your tailors chalk or fabric marker, mark the sewing line on the wrong side of your pocket pieces with a ruler, using the pattern piece as your guide.
Matching the notches, pin your pocket piece to your front piece with right sides together.
With the bulk of the fabric in front of your machine and starting at the left notch, back tack at the start of your seam, then sew in 1cm from the edge, following the line you have drawn. Next, with your needle down, lift your presser foot and pivot your fabric 90 degrees. The bulk of your fabric will be on your left. Lower your presser foot and sew along, 1cm from the edge, to the next notch. Stop with your needle down, pivot 90 degrees again, so the bulk of your fabric is behind your machine. Sew 1cm to the edge of your pieces. Back tack again at the end.

Now that you have boxed out your pocket opening it is time to mitre into the upper and lower corners of the box. Using a sharp pair of scissors, clip in at a 45 degree angle into each corner. Be extra careful not to snip through your stitching line!

Next, fold the pocket over so the wrong sides are together and the seam you have just sewn is between the two pieces. With your iron, press along the edge of the pocket opening ensuring that the corners are well turned out and the side seam of the pockets above and below the pocket opening match the side edge of the front.

It's now time to understitch your pocket opening. Back at your machine, have your pocket bag on the right-hand side, with the right side up. Stitching on the pocket bag, edge stitch 3mm in from the seam. Start at the top corner and sew down to the next, back tacking at the beginning and end.

Now fold the pocket bag in half, right sides together, so that the notches match the pocket opening. Sew the pocket bag closed across the straight top edge and around the lower curved edge with a 1cm seam allowance and back tacking at the beginning and end of each seam. Be careful not to catch your front piece in these seams. You can neaten the seams with an overlocker/serger or using a zig zag stitch on your sewing machine.

Next you will secure your pocket bag to the front piece. Pin your pocket bag, from the right side, to the front ensuring that it is sitting flat. Mark your top stitching line on the right side of the front with tailors chalk or a fabric marker and a ruler. Use your pattern piece as a guide. This line should run parallel to the top edge of the pocket bag, 5mm down, and run go from the side seam edge, stopping 5mm before the edge of the pocket bag. Top stitch along this line back tacking at the beginning and end.

Your completed pocket will look like this from the wrong side. Repeat for both sides.
Next, move on to sewing your belt loops!
4 — Belt Loops

First fold the long edges of your belt loop pieces to meet in the centre and then in half again as pressed at the beginning. They will be 1cm in width. Edge stitch to close at 3mm.

Next, pin your belt loops to the front panels at the notches above the pocket. Stay stitch the loops in place. Make sure your pocket bag is sitting flat and the side seam edges of your front piece and pocket bag are flush before you stitch.
Now you're ready to sew the centre front seam and bag out the hems of your robe!
5 — Centre Front + Bagging Out Hem

In this step, we will be bagging out the centre front corners of the hem and finishing the centre front edges.
Fold up the hem at the notch, right sides together, then fold down the 1cm seam allowance, wrong sides together. The pressing you did at the beginning will help guide you. Hold it in place with a pin. The finished hem depth will be 4cm. With your needle in 2cm from the centre front edge, stitch a straight line up to the edge of them hem. Make sure you keep the seam allowance folded down as you stitch over. Back tack at the beginning and end of this seam.


Tuck the centre front seam allowance under 1cm, then another 1cm as pressed at the start.


Keeping the seam allowance folded between your thumb and forefinger, turn out the corner so the wrong sides are together. Gently ease out the corner. You can use a point turner or an awl (very carefully!) to help ease out the point. It may also help to pin everything in place now so the seam allowance doesn’t pop out while you start the next step.

Fold back the centre front edge 1cm, then 1cm again towards the wrong side, as pressed at the beginning, so the raw edge is enclosed and pin to hold it all in place. Back tacking at the start, edge stitch along the centre front edge, removing the pins as you come to them.

When you are one stitch onto the hem, stop with your needle down. Pivot your piece 90 degrees and edge stitch along the hem approximately 10cm and back tack one stitch to secure. This will allow you to join the front and back pieces later, before you continue closing the hem. Repeat for the other side. When sewing the other side, you may find it helpful to start at the hem and then work your way up the centre front, so the bulk of the fabric stays on your left-hand side.

Trim the excess centre front seam allowance so it sits flush with the front neckline. Put your front pieces to the side while you work through the next steps.
Next, move on to assembling your collar, back panels and waist tie!
6 — Collar, Back Panels and Waist Tie


Pin the two collar pieces together at the centre back, keeping the 1cm on the long edge you pressed at the beginning out flat. Sew this seam using a 1cm seam allowance. When you reach the centre crease, stop with your needle down and pivot slightly to ensure your collar will sit nicely when you fold it. Press this seam open.

Bag out each end of the collar with a 1cm seam allowance, again making sure the 1cm seam allowance on the long edge is sitting flat.

Turn out the ends, using your point turner or awl again to gently ease out the corners. Give your collar a gentle press. Put your assembled collar aside with your fronts, ready for later.

Next we will work on the back panels!
Take your back pieces and neaten each centre back edge separately using your overlocker/serger or a zig zag stitch. If you are using an overlocker, make sure you don’t cut away the fabric as you neaten the seams. With the right sides together, pin the two pieces along the centre back edge matching the notches. Sew them together with a 1cm seam, removing the pins when you come to them. Back tack at the beginning and end.


Press the centre back seam open.
In the same way that you folded your waist tie loops, fold the long edge of your back neck tab piece to meet in the centre and then in half again as pressed at the beginning. Edge stitch to close at 3mm. Fold the back neck tab piece to create a loop and pin this to the wrong side at the centre back neck edge. Stay stitch to hold it in place.

Pop your completed back pieces aside with the collar and fronts, we'll come back to them later!


To sew your waist tie, firstly sew the two waist tie pieces with right sides together along the short edge using a 1cm seam. Press this seam open. Next, fold the waistband in half along the long edge with the right sides together, this is the opposite to how it was pressed at the beginning. Pin along the edge, matching the notches and waist tie seam. Sew down one short end, then, stopping 1cm from the edge with the needle down, pivot 90 degrees and sew along the long edge. Back tack at the beginning and end and remove the pins as you come to them. Leave the other end open.


Trim the corner where you turned 90 degrees, being careful not to cut your stitches, then turn your waist tie right side out. A knitting needle or chop stick may be helpful here!


Tuck the 1cm seam allowance in at the open end, as was pressed at the beginning. Pin, then edge stitch it closed, back tacking at the beginning and end. Alternatively, you can invisibly hand sew this opening closed. Give your waist tie a good press, making sure that the tie folds along the seam.
Put your waist tie aside until the end.
Phew, well done, next up is assembling all the pieces together!
7 — Assembling Your Robe


First, we need to attach the shoulders...
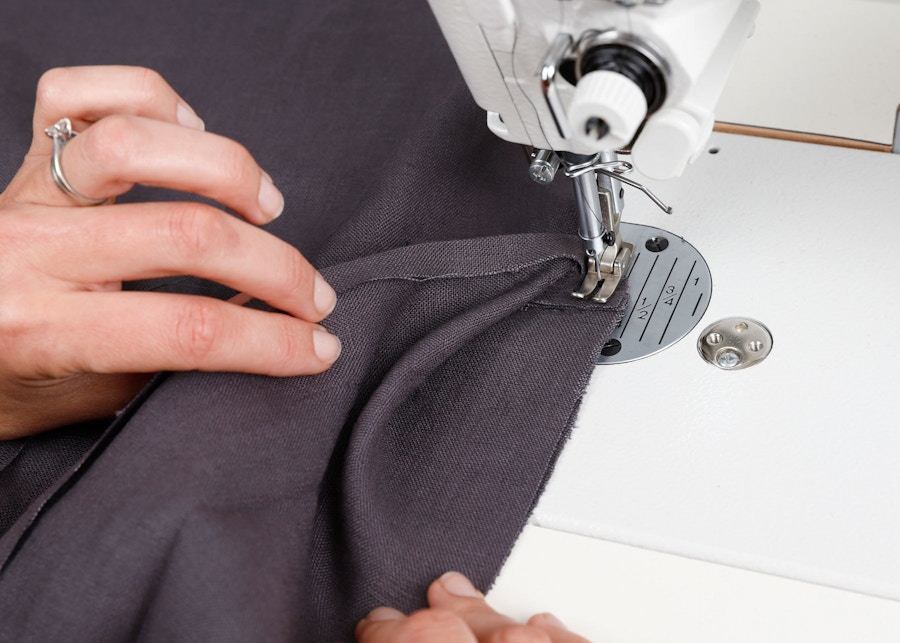
Take one front piece and pin it, right sides together, to the back at the shoulder seam. Make sure to match the notch. Do the same with the other side. Sew each shoulder with a 1cm seam allowance, removing the pins as you come to them, as pictured above. Back tack at the beginning and end of the seam.
Neaten each seam with your overlocker/serger or a zig-zag stitch. Press the seams to the back.

Next we will attach the collar to the body of the robe. The collar will encase the seam at the neck opening.
Firstly, pin the un-pressed edge of your collar to the neckline of the body. The right side of the collar will be facing the wrong side of the body. Make sure the notches and seams on the collar match the notches and seams on the body.


Next, sew the collar and body together with a 1cm seam allowance, removing the pins as you come to them. Take extra care to match the notches and centre back seams of the collar and body as you sew. Back tack at the beginning and end of the seam. Press the seam allowance in, towards the collar.

Fold the collar in half, wrong sides together, along the pre-pressed fold line. Tuck the folded edge under towards the inside of the collar, taking your time to get the point where the collar and centre front meet folded under neatly. Pin closed from the front, again making sure to match the notches and seams.

Finally, in this step, carefully edge stitch the collar closed at 3mm, with the right side facing up, removing the pins as you get to them. Back tack at the beginning and end of this seam.
Next, move on to attaching your sleeves and sewing up your side seams below!

Pin the sleeve head to the body with the right sides together and matching the notches. The single notch indicates the front of the garment, and the double notch indicates the back. Sew your sleeve to the body with a 1cm seam back tacking at the beginning and end.

Neaten your seam with your overlocker/serger, then press your seam towards the sleeve. Repeat for the other sleeve.

Now we will sew the side seams!
With your right sides together, pin your front panel to the back along the side edge, matching notches and seams.


Stitch your sides seams together using a 1cm seam, removing the pins as you come to them and back tacking at the beginning and end. Keep the sleeve hem and body hem unfolded as you sew, you will fold them back up in the next steps. When you get to the pocket be careful not to catch it in your side seam. You can pin it back or use your hand to keep of the way as you get to it.

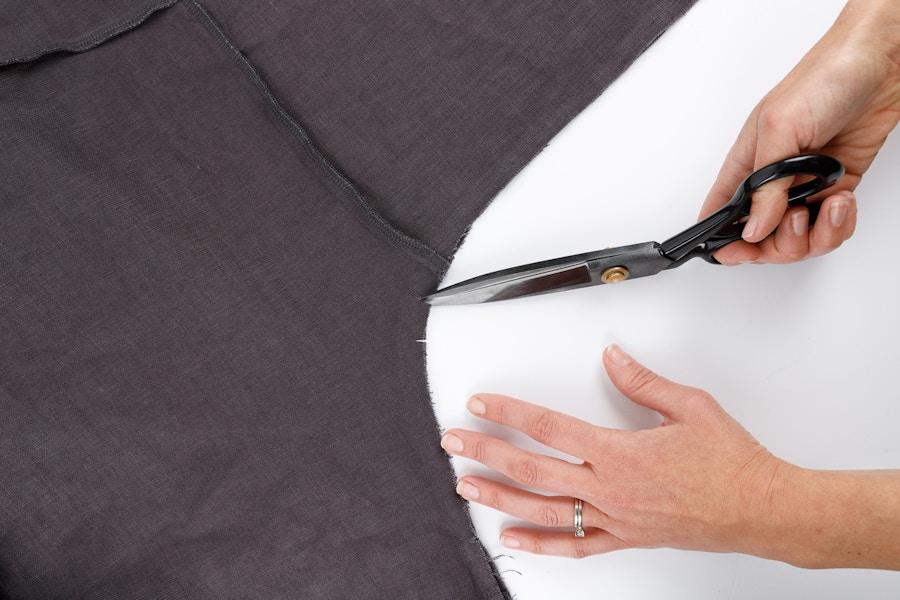
After sewing the side seam, carefully clip into the seam allowance at the underarm curve with a sharp pair of scissors. Clip 3 times, with each clip approximately 2cm apart. Be very careful not to clip your stitches! This will release some tension and allow the seam to spread cleanly when you turn your robe right side out.
Neaten the seam with your overlocker/serger, steam lightly and repeat for the other side.


Turn the sleeve hem seam allowance under 1cm then back another 4cm as indicated by the notches. The pressing you did at the very beginning will help with this. You can press again at this point to get a nice crisp edge before sewing. Stitching on the wrong side, edge stitch the entire circumference of the hem closed, 3mm from the edge of the fold. At the end of your seam, stitch over the first couple of stitches you sewed to complete the hem. It is only necessary to back tack at the end of this seam. Remember to remove the pins when you come to them.

Give your sleeve hem another press and repeat for the other sleeve.

Moving back down to the body hem now, turn under the 1cm seam allowance, then turn back another 4cm for the hem as indicated by the notches, and pressed at the beginning. Matching up the seams, pin the hem in place. You can press your hem again here to ensure everything is sitting nicely before sewing.

Starting a couple of stitches back from where you left off in step 1f., continue your edge stitch across the entire hem until you reach the other side. Remove your pins as you sew and back tack at the beginning and end of this seam.

Press your hem again.


Give your robe a final press, clip your threads and pop in your waist tie. Your robe is now complete!
Have a question? Contact us via patterns@thefabricstore.co.nz
Share your Lucie Robe with us on insta @wearethefabricstore #lucierobe


